
From Winter Clutter to Spring Freshness: A Step-by-Step Garage Decluttering Guide
- MyGarage

- Aug 12, 2025
- 3 min read
After months of chilly mornings, rainy days, and hurried dashes into the garage to grab a raincoat or sports kit, it’s no surprise that winter often leaves our garages a little disorganised. Seasonal gear, muddy boots, braai accessories, and sports equipment can all pile up, leaving the space feeling cramped and chaotic.

Spring is the perfect time for decluttering your garage — creating a fresh, organised area that’s ready for longer days and warmer weather. Here’s a step-by-step guide to help you transform your garage from a winter dumping ground into a functional, fresh space you’ll actually enjoy using.

Step 1: Clear the Decks
The first step to successful decluttering is to start with a blank canvas — ideally by removing as much as you can from the garage so you can see exactly what you’re working with.
If that’s not realistic — perhaps your garage is too full or you don’t have outdoor space to store everything during the process — try the zone-by-zone method. Tackle one section at a time, whether that’s the sports gear shelf, the garden tools wall, or the workbench. By focusing on one manageable area at a time, you can make steady progress without the overwhelm of emptying the whole garage in one go.
Step 2: Sort into Categories
With everything out in the open, it’s time to make some decisions. Create three main piles: Keep, Donate/Sell, and Dispose Of.
Keep: Items you use regularly or will need in the coming months.
Donate/Sell: Things in good condition that you no longer use but could be useful to someone else.
Dispose Of: Broken, damaged, or expired items (like old paint or chemicals) that should be safely recycled or taken to your local waste facility.
Be honest with yourself — if you haven’t used it in a year, you probably don’t need it.

Step 3: Clean and Freshen Up
Once the garage is cleared, it’s the ideal time for a deep clean. Sweep away cobwebs, dust, and leaves, then give the floor a good sweep and wash down. If you have a coated floor, this will be quick work. If it’s bare concrete, you might think about sealing or painting it for a cleaner, dust-free look.
Wipe down shelves, work surfaces, and storage containers. A clean garage not only looks better but makes working in it far more pleasant.
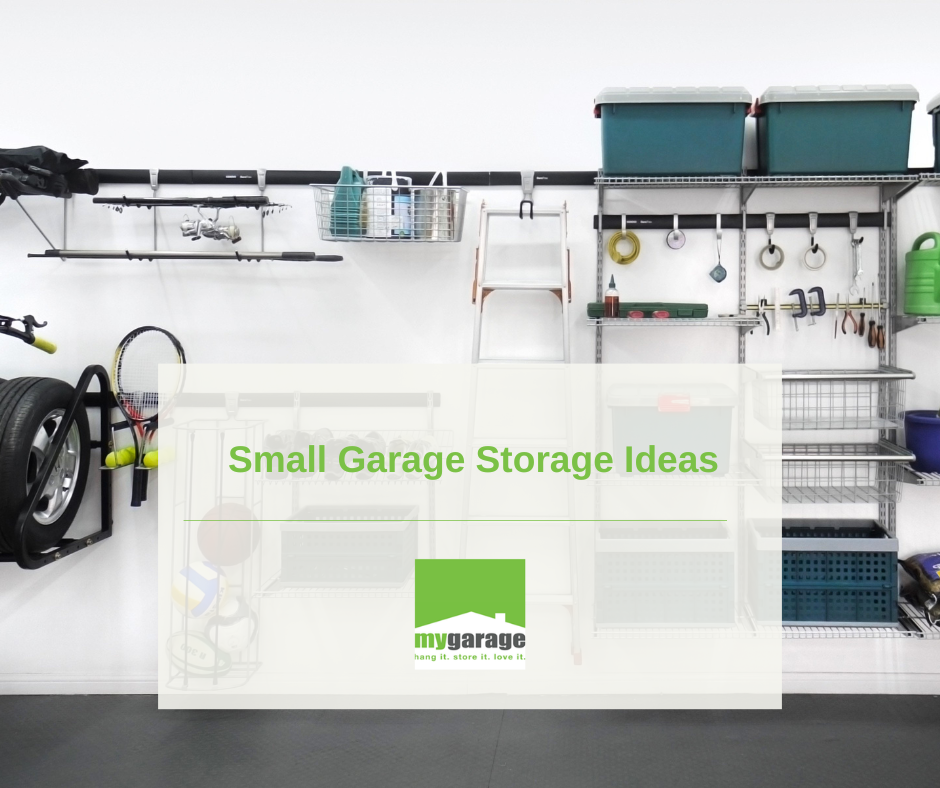
Step 4: Plan Your Storage
This is where decluttering really pays off — by making sure everything has a proper place. Instead of simply putting items back anywhere, consider:
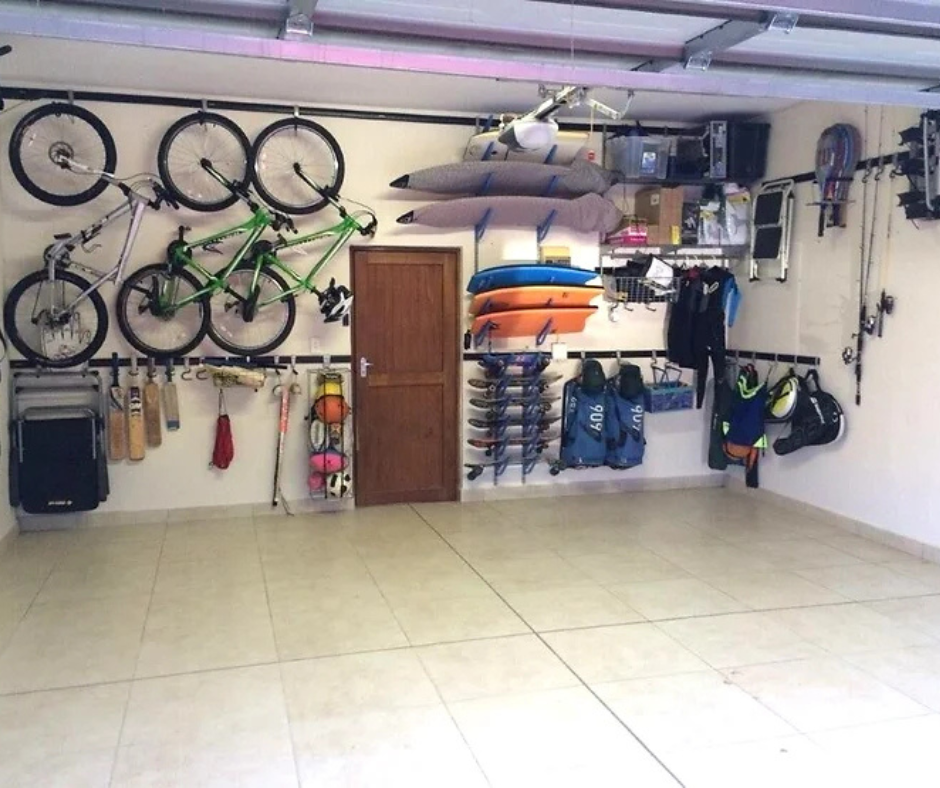
Wall-mounted storage to keep tools, bikes, and sports gear off the floor.
Shelving units for boxes, paint tins, and smaller equipment.
Overhead racks to store seasonal items like camping gear or Christmas decorations.
Hooks and rails for ladders, garden tools, and hoses.
Using vertical space is key to keeping your garage neat year-round.

Step 5: Return Items with Purpose
When putting items back, group them by use. Create zones — a gardening corner, a DIY/tool area, sports storage, and seasonal shelves. Clearly labelled storage boxes mean you can find things without rummaging.
If you can, leave some open space — it makes the garage feel more spacious and gives you room for new additions without creating clutter again.
Step 6: Keep It Organised
Decluttering isn’t just a once-a-year job — it’s an ongoing habit. Spend a few minutes every couple of weeks putting things back where they belong and doing a mini tidy-up at the end of each season.
Decluttering your garage in spring is about more than tidying up — it’s about creating a space that works for your lifestyle. With a bit of effort now, you can enjoy a garage that’s functional, easy to navigate, and ready for the sunny months ahead. Want some help? Get in touch with our experts to start your journey to a more organised and decluttered garage.


Comments